CDP
Visual Tagger End to End: From Point-and-Click to Consent-Controlled Dispatch
Mar 5, 2026
Tyler Zey
Most tag management setups involve writing CSS selectors by hand, testing them in the console, copying them into a tag manager, and hoping they survive the next deploy. The Visual Tagger makes it easier. You click the element, review the selector, and save it. The tag fires on every page where that element appears.
This guide walks through the full flow: selecting elements with the Visual Tagger, publishing tags, configuring consent-based dispatch rules, and verifying that events reach the right destinations while being blocked from the wrong ones.
We will track a "Book Demo" button click across multiple pages, dispatch it to Google Analytics but block it from Google Ads when marketing consent is not granted, and confirm everything works in the Data Governance reporting.
What You Need
An Ours Privacy account with the Tag Manager and at least two destinations configured (we will use Google Analytics and Google Ads in this example)
The Ours Privacy Chrome extension installed
The Tag Manager script installed on your website (see installation)
A Consent Management Platform (CMP) configured, either Ours Privacy CMP or a third-party CMP passing consent properties
Step 1: Activate the Visual Tagger
Open your website in Chrome and click the Ours Privacy extension icon. Select the Visual Tagger mode. The page pauses so that your clicks select elements instead of navigating or triggering actions.
Hover over the “Book Demo” button you’d like to track. For this example, we are hovering over the "Ours Health" image button. The element highlights with a green border. Click it.

The Visual Tagger generates multiple CSS selector candidates and ranks them by stability.
If the top candidate is fragile, the tagger suggests alternatives. Use Tab to cycle through overlapping elements if multiple elements sit at the click point.
Step 2: Name the Event
Once you select the element, the Visual Tagger auto-populates the event configuration:
Interaction type: Click (auto-detected from the element type)
Event name: Pre-filled based on the element text. Change it to something intentional, like
book_demo_clickorpurchaseTrigger conditions: The CSS selector, which matches this button on every page where it appears. If the "Book Demo" button appears on your pricing page, your homepage, and your product page, it fires on all three without any additional configuration. The selector is reusable site-wide.
Captured properties: Page URL, element text, and any
data-*attributes on the element.
Review the configuration, adjust the event name and properties, and save.

Step 3: Publish Your Tags
In the Ours Privacy dashboard, go to Tag Manager. Your new tags appear as unpublished drafts. Review them, then publish.
You can publish selectively (just the tags you want) or publish everything at once. Every publish creates a version with a full changelog, so you can roll back if anything goes wrong.
For details on the draft-to-production workflow, see Publishing and Versions.
Step 4: Add the Event to the Allow List
Before your event can be dispatched to destinations, it needs to be on the Event Allowlist. Navigate to the Event Allowlist in your dashboard and add book_demo_click.
Events not on the allow list are dropped before they reach any destination. This is the first layer of data governance: you decide exactly which events your system accepts.
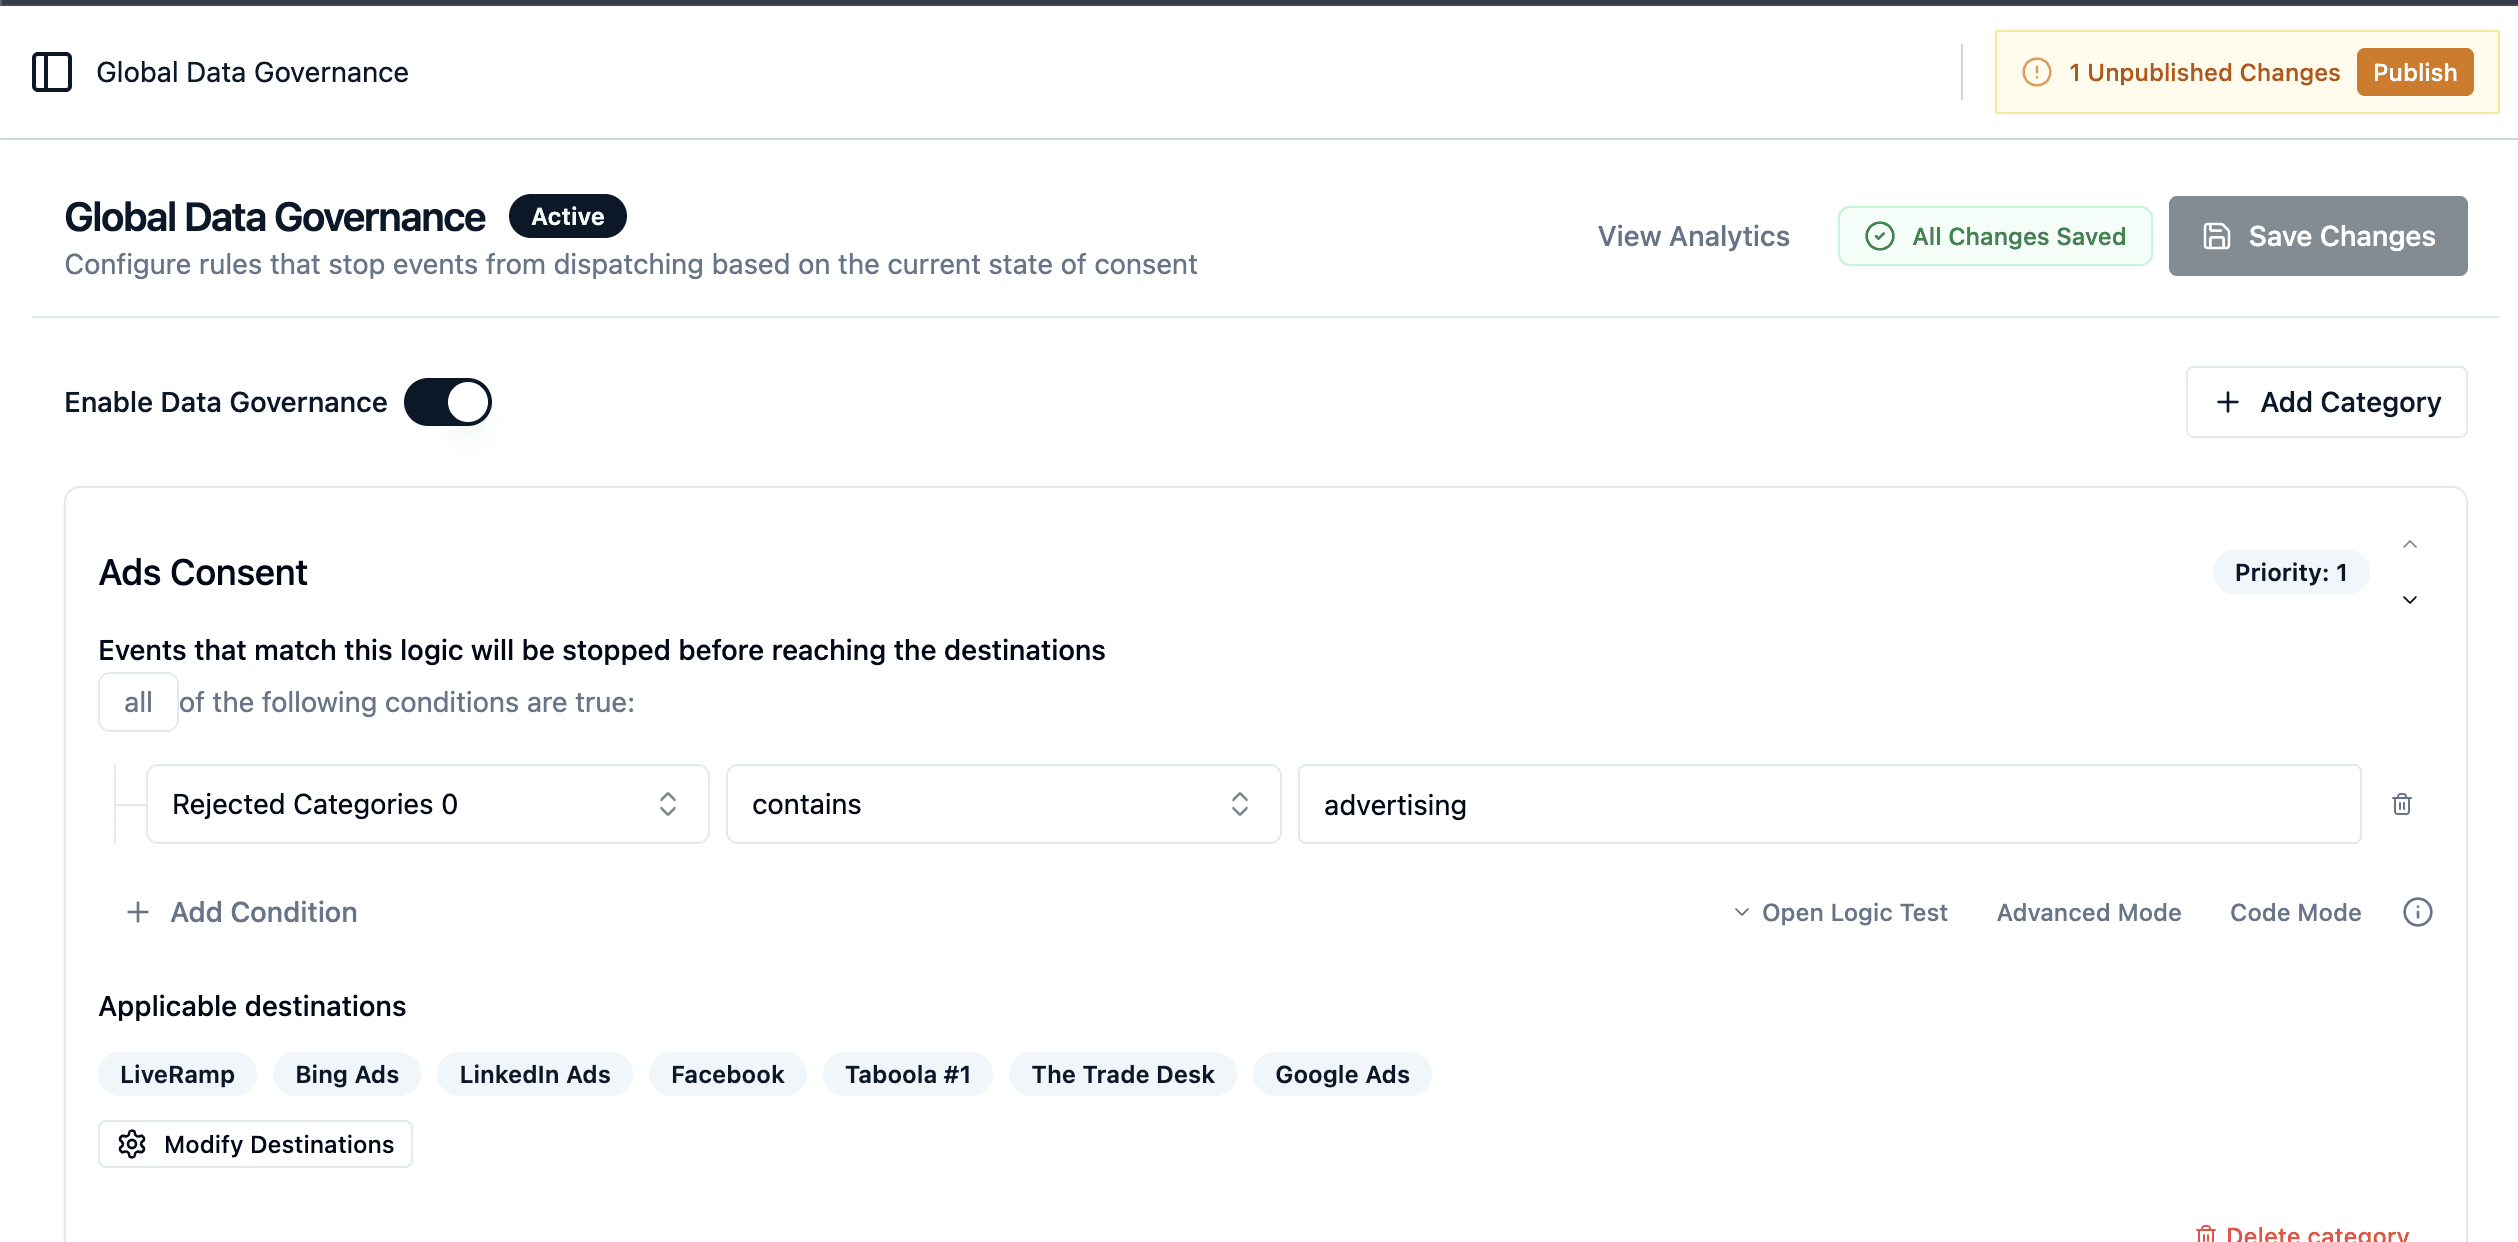
Step 5: Configure Consent Rules in Data Governance
This is where the consent layer comes in. Navigate to Data Governance in your dashboard.
We want book_demo_click to reach Google Analytics regardless of consent (it is a first-party analytics event) but to be blocked from Google Ads when a visitor has not consented to marketing.
Click + Add Category and name it "Ads".
Set the logic:
visitor.consent.marketingis falsy. This means dispatch stops when marketing consent is not granted.Assign Google Ads to this category.
Leave Google Analytics unassigned. Unassigned destinations dispatch normally.
Now when a visitor clicks "Book Demo":
If they have granted marketing consent, the event dispatches to both Google Analytics and Google Ads.
If they have not granted marketing consent, the event dispatches to Google Analytics only. Google Ads is blocked by the "Ads" category rule.
For full configuration details, see Global Data Governance.
Step 6: Test with the Chrome Extension Debugger
Before verifying in production, test the flow using the Chrome extension's debug mode. Open Chrome DevTools (F12), click the Tag Manager tab, and navigate your site.
The debugger shows:
Events firing in real time as you click elements
Which tags fired and which were blocked, so you can confirm trigger conditions are working
Variable values at the time of each event
Raw event data in JSON format
Click the "Book Demo" button and confirm book_demo_click appears in the event timeline. Check the Tags tab to verify the tag fired.
For more on debugging, see Preview Mode.
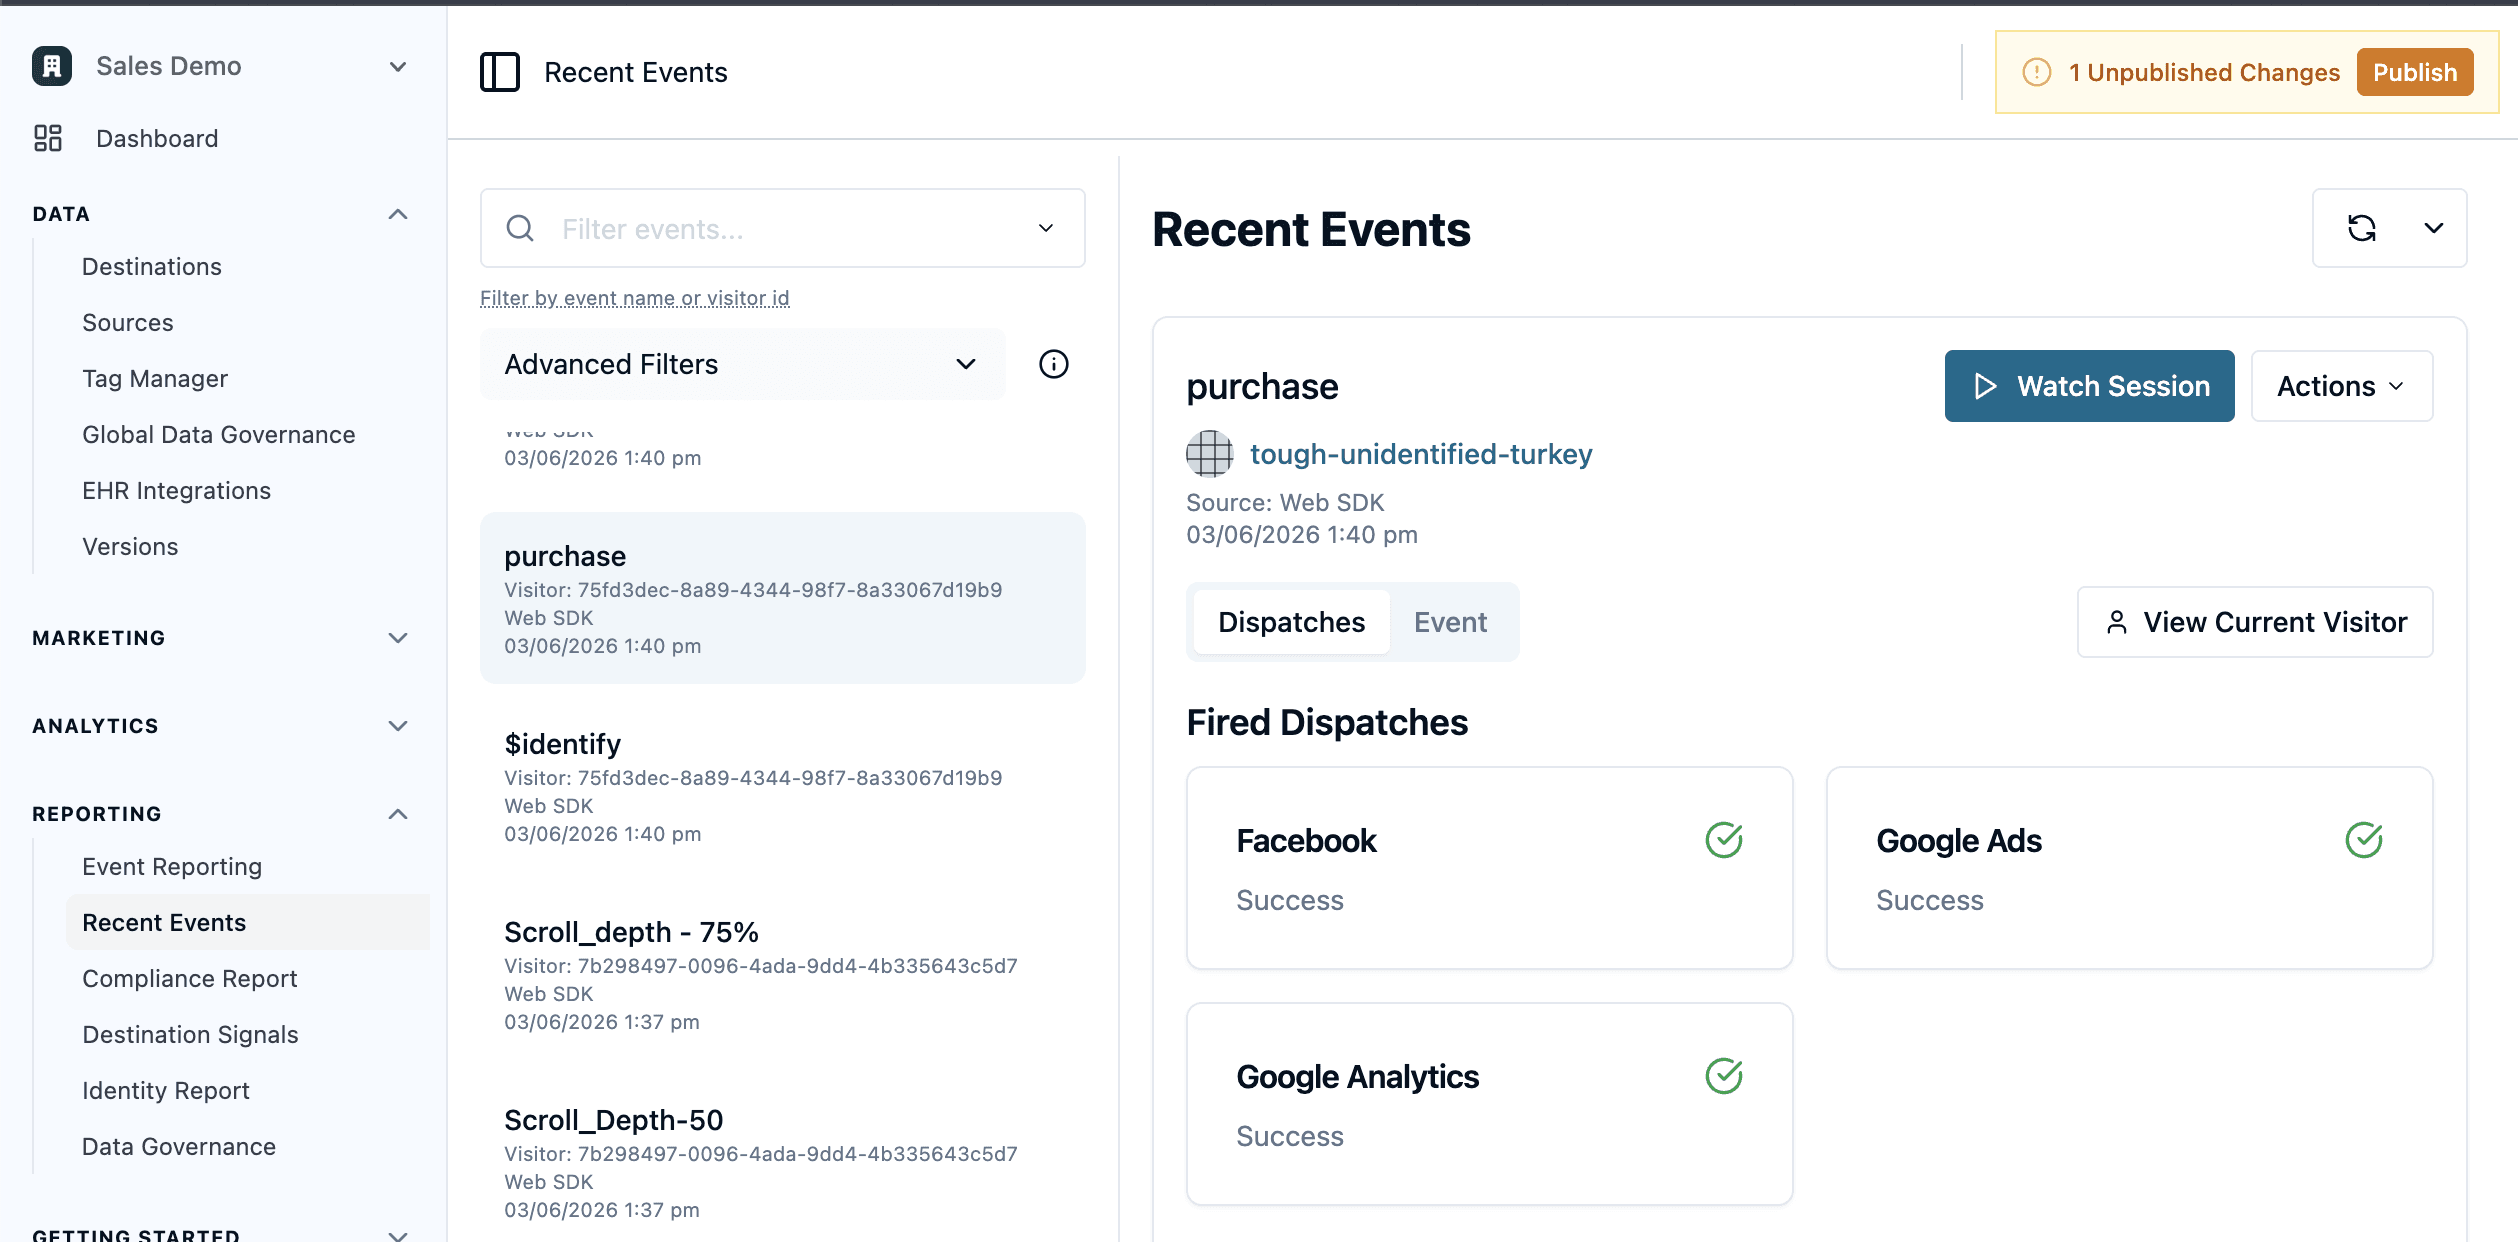
Step 7: Verify Dispatch in Recent Events
Once you have confirmed tags are firing correctly, check the Recent Events dashboard in the Ours Privacy app.
Find your book_demo_click event and expand the Dispatches section. This is full-loop verification. You can see exactly which destinations received the event and exactly which were blocked and why.
What You Built
In seven steps you went from "I want to track this button" to a fully governed event pipeline:
Visual Tagger selected the element and generated a stable CSS selector that works on every page where the element appears.
Event Allowlist controls which events enter your system at all.
Data Governance enforces consent rules at the dispatch layer, blocking events from reaching destinations when consent is not granted.
Chrome extension debugger and Recent Events dashboard give you real-time and historical verification of the entire flow.
No hand-written selectors. No per-page trigger duplication. No hoping that consent logic is configured correctly in each destination individually. The governance is centralized, the selectors are reusable, and the verification is built in.
